工具:Android Studio + IDEA
加固流程
1
2
3
4
5
6
7
8
1. 原始APK -> 解包 -> 得到原始的 classes.dex (Source.dex) 2. 使用加密算法 (如AES) 对 Source.dex 进行加密 -> 得到 encrypted.dex 3. 准备一个“壳程序” -> 其代码编译后为 Shell.dex 4. 制作新的APK: a. 将 Shell.dex 重命名为 classes.dex b. 将 encrypted.dex 放入新APK的 assets 目录 c. 修改 AndroidManifest.xml,将启动入口指向“壳程序”的Application d. 重新打包、签名 -> 得到加固后的APK
说明:这是手动操作会让你更直观的理解,具体步骤。
解密流程
1
2
3
4
5
6
7
8
9
1. 用户点击App图标 -> Android系统启动App 2. 系统根据 AndroidManifest.xml 找到入口,启动了“壳”的Application (ProxyApplication) 3. ProxyApplication 的关键方法 (如 attachBaseContext) 被调用 4. 在 attachBaseContext 中: a. 从 assets 目录读取 encrypted.dex 文件 b. 在内存中用密钥解密,还原出原始的 Source.dex 的字节数据 c. 使用 DexClassLoader 动态加载解密后的DEX字节流 d. 通过反射,创建原始Application的实例,并调用其方法,将程序的控制权交还给原始逻辑 5. App正常运行,用户无感知
可能存在问题 APK解包后有多个dex文件
解决方法 :build.gradle 配置 defaultConfig 添加 multiDexEnabled = false
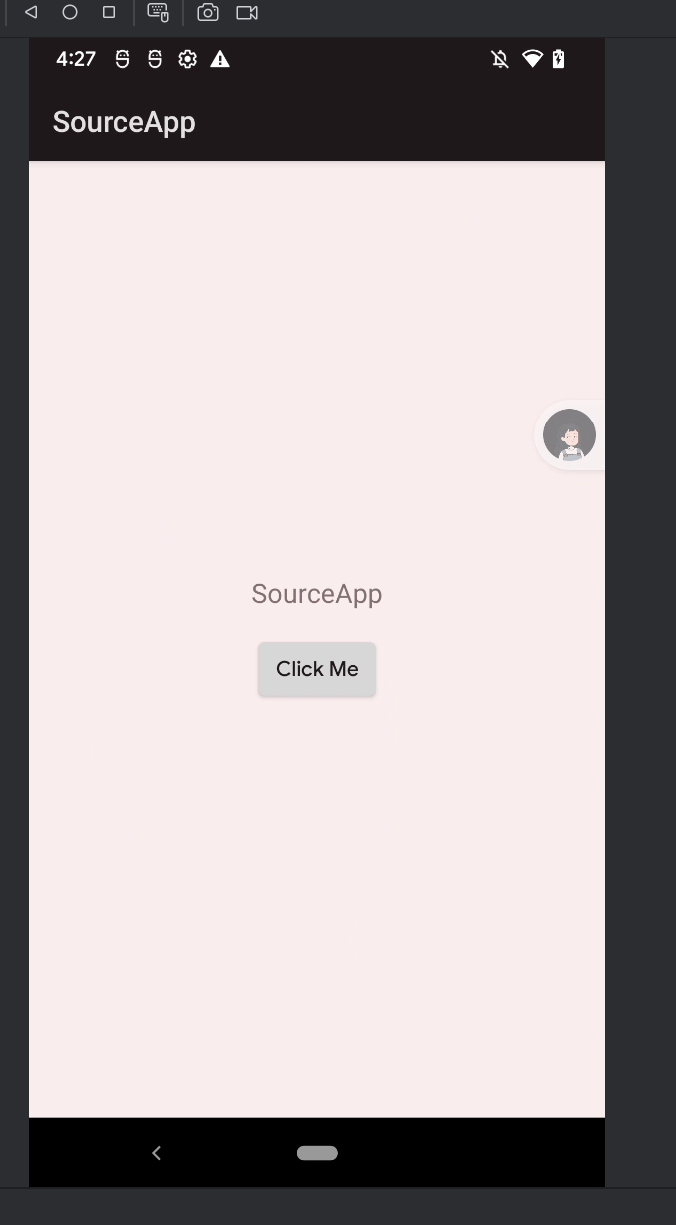
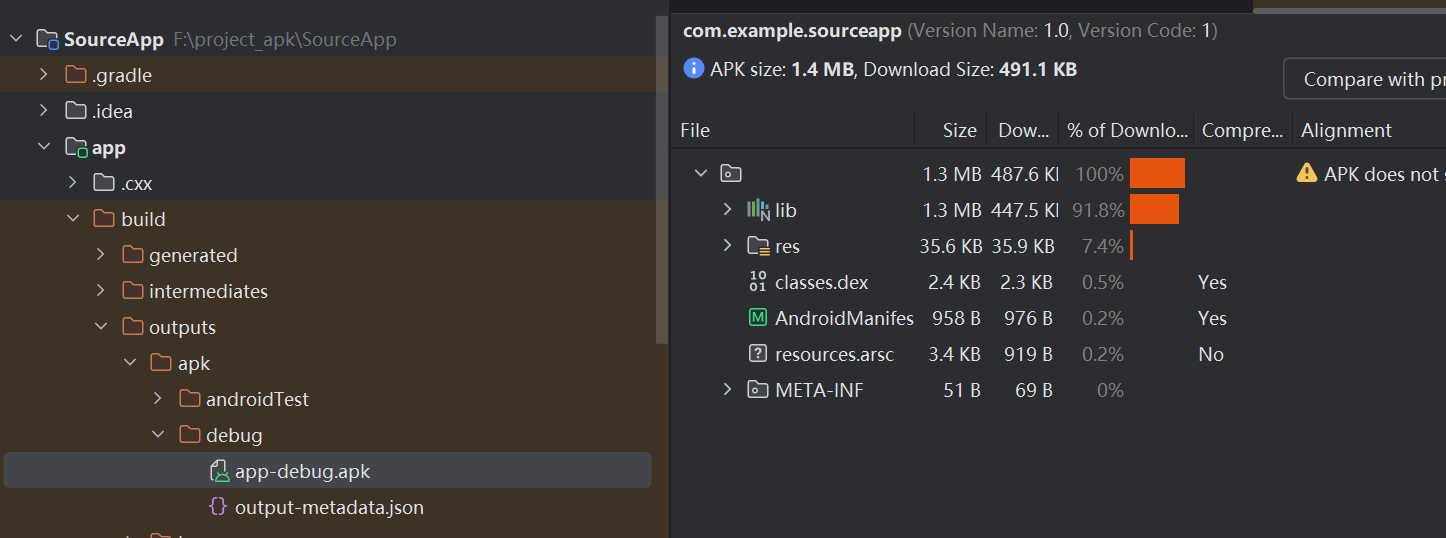
编写SourceApp
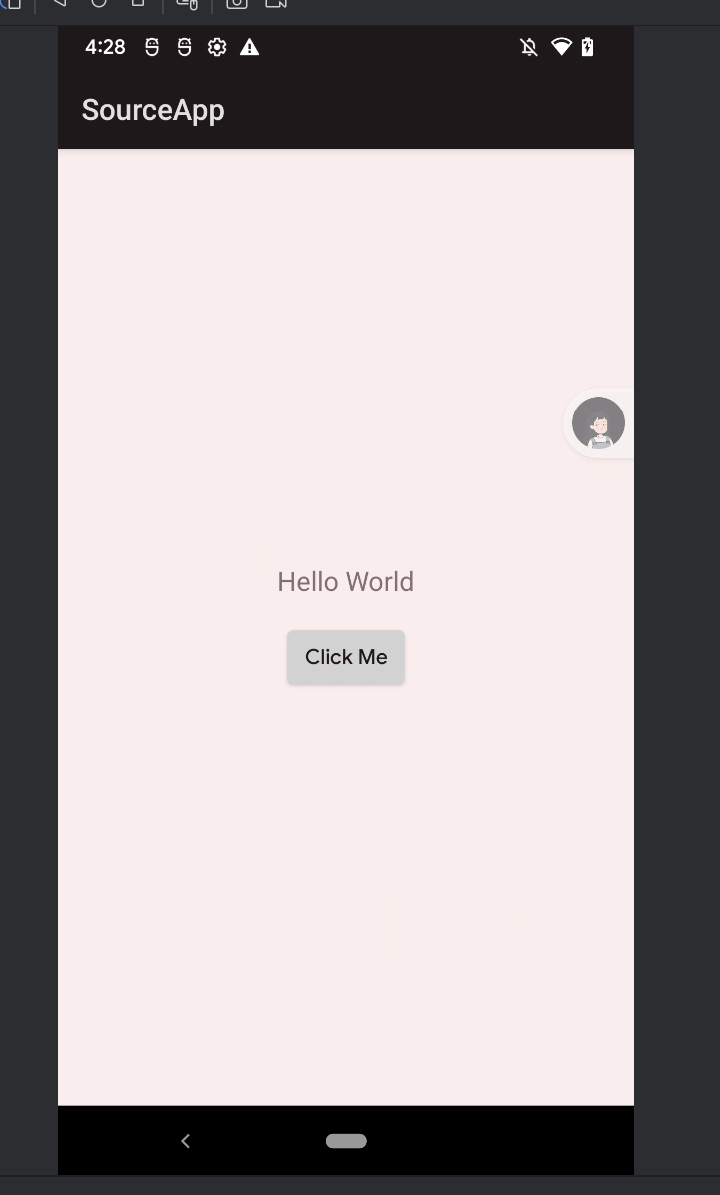
1
2
3
4
5
6
7
8
9
10
11
12
13
14
15
16
17
18
19
20
//MainActivity.java package com.example.sourceapp; import android.app.Activity; import android.os.Bundle; import android.widget.Button; import android.widget.TextView; public class MainActivity extends Activity { @Override protected void onCreate(Bundle savedInstanceState) { super.onCreate(savedInstanceState); setContentView(R.layout.activity_main); Button helloButton = findViewById(R.id.helloButton); TextView helloText = findViewById(R.id.helloText); helloButton.setOnClickListener(v -> helloText.setText("Hello World")); } }
1
2
3
4
5
6
7
8
9
10
11
12
13
14
15
16
17
18
19
20
21
22
23
24
25
26
// MyApplication.java package com.example.sourceapp; import android.app.Application; import android.content.Context; import android.util.Log; /** * 这是SourceApp的自定义Application类。 * 在真实项目中,这里通常会做一些全局初始化操作。 */ public class MyApplication extends Application { private static final String TAG = "MyApplication(Source)"; @Override protected void attachBaseContext(Context base) { super.attachBaseContext(base); // 必须保留 Log.i(TAG, "SourceApp's attachBaseContext() called"); } @Override public void onCreate() { super.onCreate(); Log.i(TAG, "SourceApp's MyApplication.onCreate() is called!"); System.out.println("--- 原始App的Application已经成功运行 ---"); } }
1
2
3
4
5
6
7
8
9
10
11
12
13
14
15
16
17
18
19
20
21
22
23
24
25
26
27
// AndroidManifest.xml <?xml version="1.0" encoding="utf-8"?> <manifest xmlns:android="http://schemas.android.com/apk/res/android" xmlns:tools="http://schemas.android.com/tools"> <uses-permission android:name="android.permission.INTERNET" /> <uses-permission android:name="android.permission.ACCESS_NETWORK_STATE" /> <application android:name=".MyApplication" android:allowBackup="true" android:dataExtractionRules="@xml/data_extraction_rules" android:fullBackupContent="@xml/backup_rules" android:icon="@mipmap/ic_launcher" android:label="@string/app_name" android:roundIcon="@mipmap/ic_launcher_round" android:supportsRtl="true"> <activity android:name=".MainActivity" android:exported="true"> <intent-filter> <action android:name="android.intent.action.MAIN" /> <category android:name="android.intent.category.LAUNCHER" /> </intent-filter> </activity> </application> </manifest>
运行命令 build->generate APKs
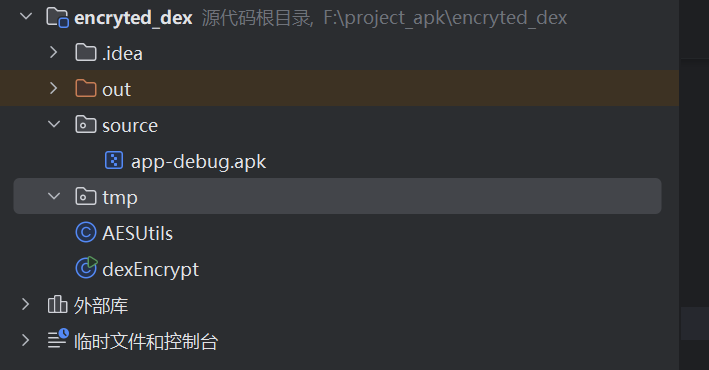
编写Shell加密
1
2
3
4
5
6
7
8
9
10
11
12
13
14
15
16
17
18
19
20
21
22
23
24
25
26
27
28
29
30
31
32
33
34
35
36
37
38
39
40
41
42
43
44
45
46
47
48
49
50
51
52
53
//AESUtils.java import javax.crypto.Cipher; import javax.crypto.spec.SecretKeySpec; import java.nio.charset.StandardCharsets; import java.security.MessageDigest; import java.util.Arrays; public class AESUtils { private static final String ALGORITHM = "AES"; // AES/ECB/PKCS5Padding 是一个常用的模式,但请注意ECB模式的安全性较低,实际产品中建议使用CBC或GCM模式 private static final String TRANSFORMATION = "AES/ECB/PKCS5Padding"; /** * 加密 * @param data 需要加密的数据 * @param key 密钥 * @return 加密后的字节数组 */ public static byte[] encrypt(byte[] data, String key) throws Exception { SecretKeySpec secretKey = generateKey(key); Cipher cipher = Cipher.getInstance(TRANSFORMATION); cipher.init(Cipher.ENCRYPT_MODE, secretKey); return cipher.doFinal(data); } /** * 解密 * @param data 需要解密的数据 * @param key 密钥 * @return 解密后的字节数组 */ public static byte[] decrypt(byte[] data, String key) throws Exception { SecretKeySpec secretKey = generateKey(key); Cipher cipher = Cipher.getInstance(TRANSFORMATION); cipher.init(Cipher.DECRYPT_MODE, secretKey); return cipher.doFinal(data); } /** * 从字符串生成一个128位的密钥 (AES-128) * @param keyString 任意字符串 * @return SecretKeySpec */ private static SecretKeySpec generateKey(String keyString) throws Exception { byte[] keyBytes = keyString.getBytes(StandardCharsets.UTF_8); // 使用SHA-256来确保密钥长度符合要求,并取前16字节 (128位) MessageDigest sha = MessageDigest.getInstance("SHA-256"); keyBytes = sha.digest(keyBytes); keyBytes = Arrays.copyOf(keyBytes, 16); // AES-128 return new SecretKeySpec(keyBytes, ALGORITHM); } }
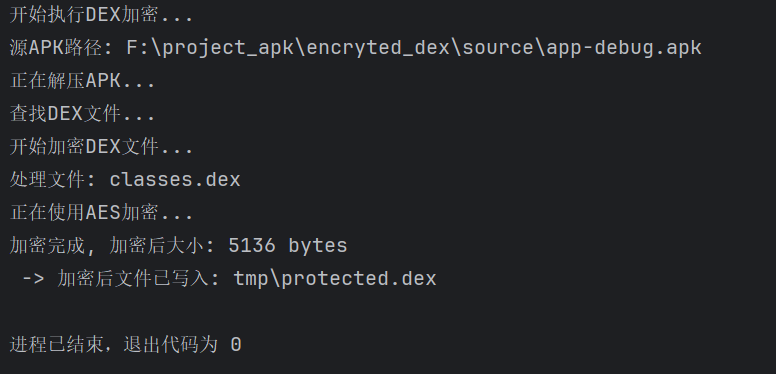
1
2
3
4
5
6
7
8
9
10
11
12
13
14
15
16
17
18
19
20
21
22
23
24
25
26
27
28
29
30
31
32
33
34
35
36
37
38
39
40
41
42
43
44
45
46
47
48
49
50
51
52
53
54
55
56
57
58
59
60
61
62
63
64
65
66
67
68
69
70
71
72
73
74
75
76
77
78
79
80
81
82
83
84
85
86
87
88
89
90
91
92
93
94
95
96
97
98
99
100
101
102
103
104
105
106
107
108
109
110
111
112
113
114
115
116
117
118
119
120
121
122
123
124
125
//dexEncrypt.java import java.io.ByteArrayOutputStream; import java.io.File; import java.io.FileInputStream; import java.io.FileOutputStream; import java.io.FilenameFilter; import java.util.zip.ZipEntry; import java.util.zip.ZipInputStream; public class dexEncrypt { // 定义你的加密密钥,这个密钥需要和你运行时解密的密钥保持一致 private static final String SECRET_KEY = "this-is-a-secret-key-123456"; /** * 主执行方法,可以直接运行这个main函数来执行加密 */ public static void main(String[] args) { try { System.out.println("开始执行DEX加密..."); // 1. 定义输入和输出文件路径 // 输入:源APK路径 File sourceApk = new File("source/app-debug.apk"); // 输出:加密后的DEX要存放的路径 (壳工程的assets目录下) File outputDir = new File("tmp/"); if (!outputDir.exists()) { outputDir.mkdirs(); } System.out.println("源APK路径: " + sourceApk.getAbsolutePath()); // 2. 创建临时目录用于解压APK File tempDir = new File("source/temp"); if (!tempDir.exists()) { tempDir.mkdirs(); } // 3. 解压APK文件 System.out.println("正在解压APK..."); unzipAPK(sourceApk, tempDir); // 4. 查找所有DEX文件 System.out.println("查找DEX文件..."); File[] dexFiles = tempDir.listFiles(new FilenameFilter() { @Override public boolean accept(File dir, String name) { return name.toLowerCase().endsWith(".dex"); } }); if (dexFiles == null || dexFiles.length == 0) { System.out.println("未找到DEX文件!"); return; } System.out.println("开始加密DEX文件..."); for (File dexFile : dexFiles) { System.out.println("处理文件: " + dexFile.getName()); // 读取DEX文件内容 byte[] dexData = readFileToByteArray(dexFile); // 使用AES加密DEX数据 System.out.println("正在使用AES加密..."); byte[] encryptedData = AESUtils.encrypt(dexData, SECRET_KEY); System.out.println("加密完成, 加密后大小: " + encryptedData.length + " bytes"); //得到的加密文件xxx.dex放到ShellApp的app/src/main/assets/目录下。 // 确定输出文件名 (e.g., classes2.dex -> protected2.dex) String encryptedDexName = dexFile.getName().replace("classes", "protected"); File encryptedDexFile = new File(outputDir, encryptedDexName); // 写入文件 try (FileOutputStream fos = new FileOutputStream(encryptedDexFile)) { fos.write(encryptedData); } System.out.println(" -> 加密后文件已写入: " + encryptedDexFile.getPath()); } } catch (Exception e) { e.printStackTrace(); } } /** * 解压APK文件到指定目录 */ private static void unzipAPK(File apkFile, File outputDir) throws Exception { byte[] buffer = new byte[1024]; ZipInputStream zis = new ZipInputStream(new FileInputStream(apkFile)); ZipEntry zipEntry = zis.getNextEntry(); while (zipEntry != null) { File newFile = new File(outputDir, zipEntry.getName()); if (zipEntry.isDirectory()) { newFile.mkdirs(); } else { // 创建父目录 new File(newFile.getParent()).mkdirs(); FileOutputStream fos = new FileOutputStream(newFile); int len; while ((len = zis.read(buffer)) > 0) { fos.write(buffer, 0, len); } fos.close(); } zipEntry = zis.getNextEntry(); } zis.closeEntry(); zis.close(); } /** * 读取文件内容到字节数组 */ private static byte[] readFileToByteArray(File file) throws Exception { FileInputStream fis = new FileInputStream(file); ByteArrayOutputStream bos = new ByteArrayOutputStream(); byte[] buffer = new byte[1024]; int len; while ((len = fis.read(buffer)) != -1) { bos.write(buffer, 0, len); } fis.close(); return bos.toByteArray(); } }
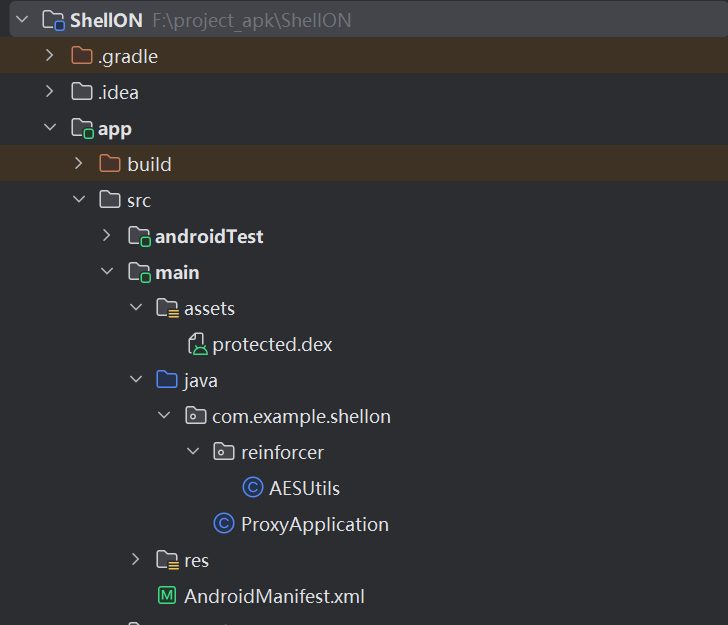
编写加壳App 首先,把加密后的dex(projected.dex)放到asset目录下。
然后是AESUtils.java这个工具类复制下来,它的作用是用来加/解密。
其次把ShellON项目中的res目录全部替换为SourceApp项目中的资源文件(res)
最后是修改AndriodManifest.xml
1
2
3
4
5
6
7
8
9
10
11
12
13
14
15
16
17
18
19
20
21
22
23
24
25
26
27
28
29
30
31
32
33
34
35
36
37
38
39
40
41
42
43
44
45
46
47
48
49
50
51
52
53
54
55
56
57
58
59
60
61
62
63
64
65
66
67
68
69
70
71
72
73
74
75
76
77
78
79
80
81
82
83
84
85
86
87
88
89
90
91
92
93
94
95
96
97
98
99
100
101
102
103
104
105
106
107
108
109
110
111
112
113
114
115
116
117
118
119
120
121
122
123
124
125
126
127
128
129
130
131
132
133
134
135
136
137
138
139
140
141
142
143
144
145
146
147
148
149
150
151
152
153
154
155
156
157
158
159
160
161
162
163
164
165
166
167
168
169
170
171
172
173
174
175
176
177
178
179
180
181
182
183
//ProxyApplication.java package com.example.shellon; import android.app.Application; import android.content.Context; import android.content.pm.ApplicationInfo; import android.content.pm.PackageManager; import android.content.res.AssetManager; import android.os.Bundle; import android.text.TextUtils; import android.util.ArrayMap; import android.util.Log; import com.example.shellon.reinforcer.AESUtils; // 导入你的AES工具类 import java.io.ByteArrayOutputStream; import java.io.File; import java.io.FileOutputStream; import java.io.IOException; import java.io.InputStream; import java.lang.ref.WeakReference; import java.lang.reflect.Field; import java.lang.reflect.Method; import java.util.ArrayList; import java.util.List; import dalvik.system.DexClassLoader; public class ProxyApplication extends Application { private static final String TAG = "ProxyApplication"; // 密钥必须和加密时完全一致! private static final String SECRET_KEY = "this-is-a-secret-key-123456"; private String originalAppName; private Application originalApp; @Override protected void attachBaseContext(Context base) { super.attachBaseContext(base); Log.d(TAG, "壳Application attachBaseContext() 开始执行..."); try { // 1. 获取在AndroidManifest中配置的原始Application类名 getOriginalAppName(base); // 2. 创建用于存放解密后DEX和优化后DEX的目录 File odexDir = getDir("odex", MODE_PRIVATE); File dexDir = getDir("dex", MODE_PRIVATE); // 3. 从assets目录解密所有DEX文件到私有目录 List<File> decryptedDexFiles = decryptAllDex(base, dexDir); if (decryptedDexFiles.isEmpty()) { Log.e(TAG, "错误:没有找到或解密任何DEX文件!"); return; } // 4. 将所有解密后的DEX文件路径用 ":" 连接起来 String dexPath = TextUtils.join(File.pathSeparator, decryptedDexFiles); Log.d(TAG, "DexClassLoader 加载路径: " + dexPath); // 5. 使用DexClassLoader加载所有解密后的DEX DexClassLoader dexClassLoader = new DexClassLoader( dexPath, odexDir.getAbsolutePath(), null, base.getClassLoader() ); injectClassLoader(dexClassLoader); // 6. 通过反射创建原始Application实例,并将控制权交还给它 Log.d(TAG, "正在加载原始Application: " + originalAppName); Class<?> originalAppClass = dexClassLoader.loadClass(originalAppName); originalApp = (Application) originalAppClass.newInstance(); // 调用原始Application的attachBaseContext方法 Method attachBaseContextMethod = android.content.ContextWrapper.class .getDeclaredMethod("attachBaseContext", Context.class); attachBaseContextMethod.setAccessible(true); attachBaseContextMethod.invoke(originalApp, base); Log.i(TAG, "Successfully delegated context to original application."); } catch (Exception e) { Log.e(TAG, "壳执行失败", e); } } @Override public void onCreate() { super.onCreate(); // 将onCreate的调用也委托给原始Application if (originalApp != null) { Log.d(TAG, "正在调用原始Application的onCreate()"); originalApp.onCreate(); } else { Log.d(TAG, "壳Application onCreate(),但原始App为空"); } } private void getOriginalAppName(Context context) throws PackageManager.NameNotFoundException { ApplicationInfo appInfo = context.getPackageManager().getApplicationInfo(context.getPackageName(), PackageManager.GET_META_DATA); Bundle metaData = appInfo.metaData; if (metaData != null) { originalAppName = metaData.getString("ORIGINAL_APPLICATION"); } // 如果原始App没有自定义Application,则默认为android.app.Application if (originalAppName == null) { originalAppName = "android.app.Application"; } Log.d(TAG, "获取到原始Application类名: " + originalAppName); } private void injectClassLoader(ClassLoader cl) throws Exception { // 获取当前ActivityThread的mPackages Class<?> activityThreadClass = Class.forName("android.app.ActivityThread"); Method currentActivityThreadMethod = activityThreadClass.getDeclaredMethod("currentActivityThread"); Object currentActivityThread = currentActivityThreadMethod.invoke(null); // 获取mPackages字段 Field mPackagesField = activityThreadClass.getDeclaredField("mPackages"); mPackagesField.setAccessible(true); ArrayMap<String, WeakReference<?>> mPackages = (ArrayMap<String, WeakReference<?>>) mPackagesField.get(currentActivityThread); // 替换LoadedApk的mClassLoader WeakReference<?> wr = mPackages.get(getPackageName()); Object loadedApk = wr.get(); Class<?> loadedApkClass = loadedApk.getClass(); Field mClassLoaderField = loadedApkClass.getDeclaredField("mClassLoader"); mClassLoaderField.setAccessible(true); mClassLoaderField.set(loadedApk, cl); } private List<File> decryptAllDex(Context context, File dexDir) throws Exception { List<File> dexFiles = new ArrayList<>(); AssetManager assets = context.getAssets(); String[] assetList = assets.list(""); if (assetList != null) { for (String assetName : assetList) { // 查找所有以 "protected" 开头, 以 ".dex" 结尾的文件 if (assetName.startsWith("protected") && assetName.endsWith(".dex")) { String decryptedName = assetName.replace("protected", "classes"); File decryptedFile = new File(dexDir, decryptedName); // 优化:如果文件已存在,则不再重复解密,加快二次启动速度 if (decryptedFile.exists()) { Log.d(TAG, "DEX " + decryptedName + " 已存在,跳过解密。"); dexFiles.add(decryptedFile); continue; } Log.d(TAG, "正在处理加密文件: " + assetName); // 从assets读取加密数据 byte[] encryptedData = readBytesFromAssets(assets, assetName); // 解密 Log.d(TAG, " -> 正在解密..."); byte[] decryptedData = AESUtils.decrypt(encryptedData, SECRET_KEY); // 写入私有目录 try (FileOutputStream fos = new FileOutputStream(decryptedFile)) { fos.write(decryptedData); } Log.d(TAG, " -> 成功解密并保存到: " + decryptedFile.getAbsolutePath()); dexFiles.add(decryptedFile); } } } return dexFiles; } private byte[] readBytesFromAssets(AssetManager assets, String assetName) throws IOException { try (InputStream is = assets.open(assetName); ByteArrayOutputStream bos = new ByteArrayOutputStream()) { byte[] buffer = new byte[1024]; int len; while ((len = is.read(buffer)) != -1) { bos.write(buffer, 0, len); } return bos.toByteArray(); } } }
1
2
3
4
5
6
7
8
9
10
11
12
13
14
15
16
17
18
19
20
21
22
23
24
25
26
27
28
29
30
31
//AndriodManifest.xml <?xml version="1.0" encoding="utf-8"?> <manifest xmlns:android="http://schemas.android.com/apk/res/android" xmlns:tools="http://schemas.android.com/tools"> <uses-permission android:name="android.permission.INTERNET" /> <uses-permission android:name="android.permission.ACCESS_NETWORK_STATE" /> <application android:name="com.example.shellon.ProxyApplication" android:allowBackup="true" android:dataExtractionRules="@xml/data_extraction_rules" android:fullBackupContent="@xml/backup_rules" android:icon="@mipmap/ic_launcher" android:label="@string/app_name" android:roundIcon="@mipmap/ic_launcher_round" android:supportsRtl="true"> <meta-data android:name="ORIGINAL_APPLICATION" android:value="com.example.sourceapp.MyApplication" /> <activity android:name="com.example.sourceapp.MainActivity" android:exported="true"> <intent-filter> <action android:name="android.intent.action.MAIN" /> <category android:name="android.intent.category.LAUNCHER" /> </intent-filter> </activity> </application> </manifest>
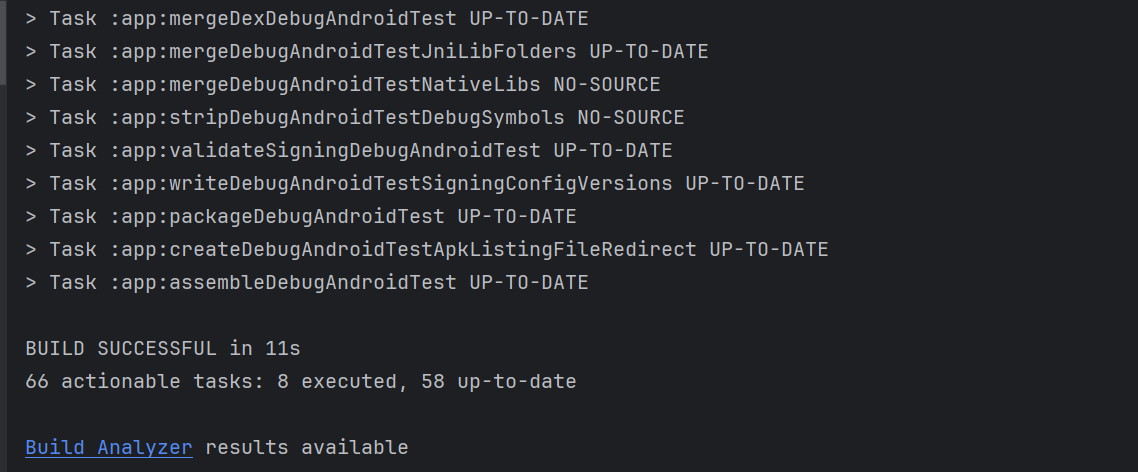
运行命令 build->generate APKs
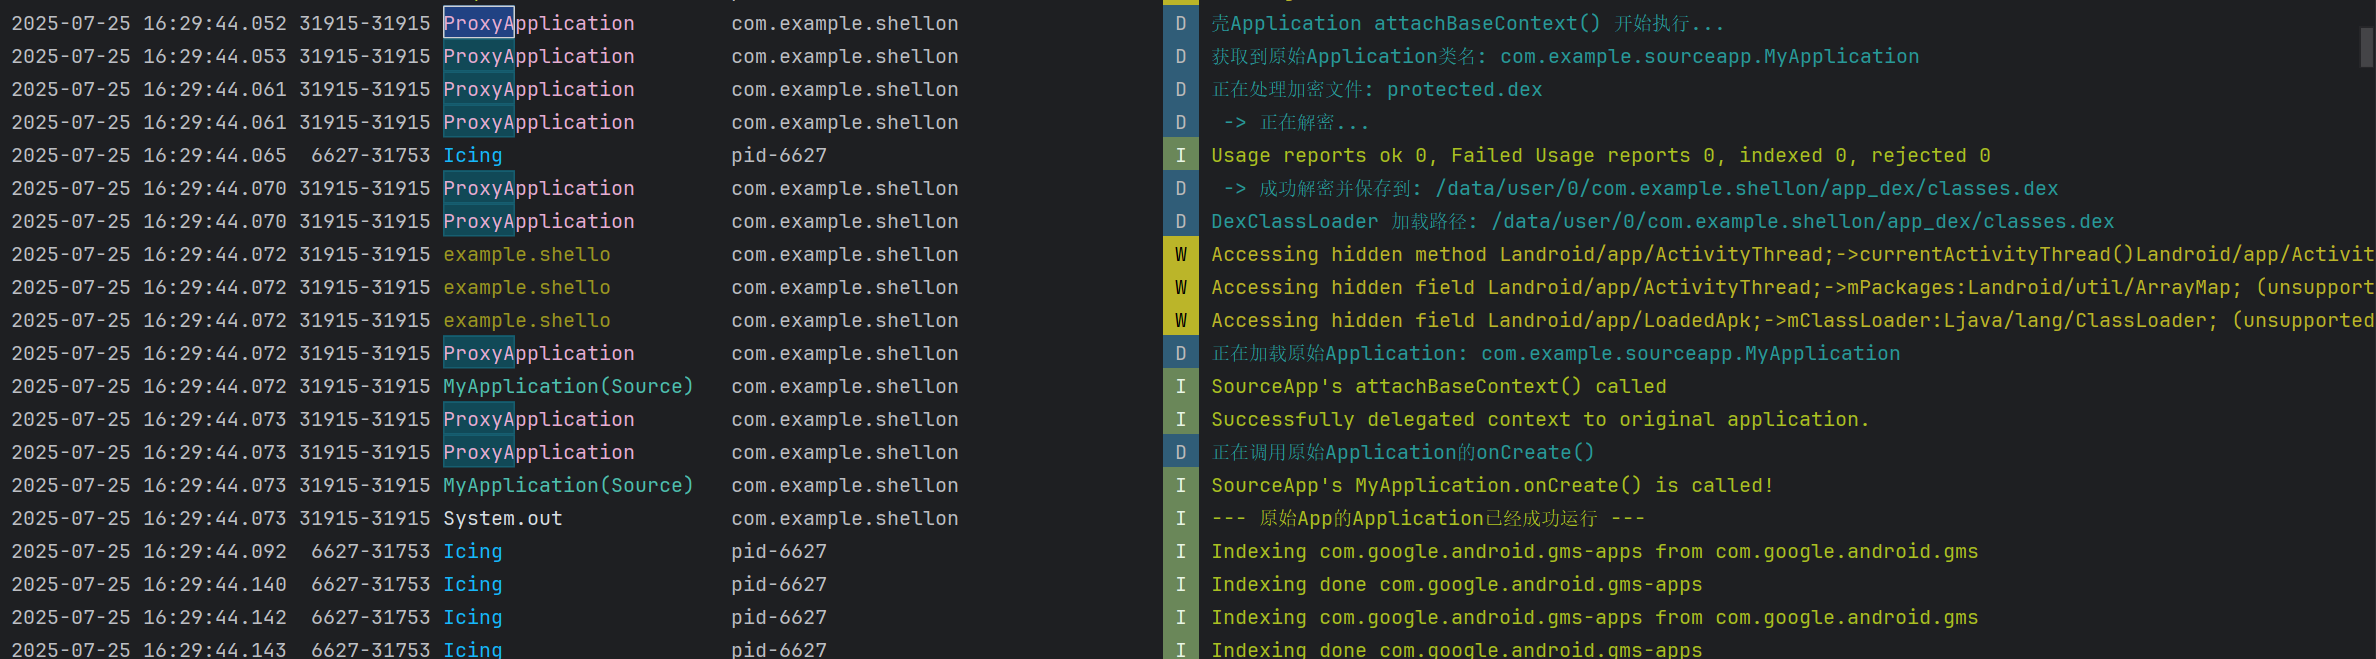
运行日志
JEB对比 SourceApp VS ShellApp 未加壳
加壳
可以看到原始代码我们已经看不到了,变成了我们加壳程序,具有对抗反编译的功能。
目前,这种加固通常被称为第一代壳—整体加固。还有一种加固是函数抽取型,两者就是细粒度不同。